Contact Star Anise Organic Wholefoods
 

Please use the form on the right to contact me!
I will get back to all enquiries as soon as possible.

Soulla x 


123 Street Avenue, City Town, 99999

(123) 555-6789

email@address.com


You can set your address, phone number, email and site description in the settings tab.
Link to read me page with more information.

Blog

This blog started as a way for me to share my recipes + culinary adventures, tips for vibrant health + happiness, thoughts on the latest developments in nutritional medicine + the low down on the Sydney wholefoods scene and beyond...

Filtering by Category: Dips

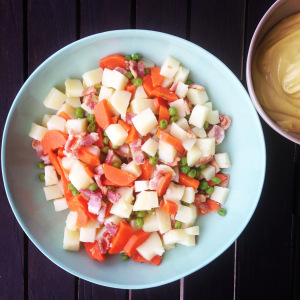
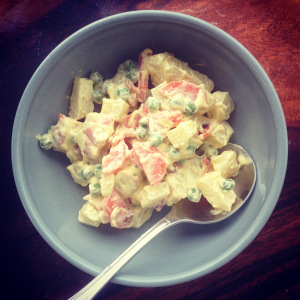
Potato salad with home-made mayonnaise

Becca Crawford


Cooked and cooled potatoes are an excellent source of resistant starch, a prebiotic that helps feed the probiotics (good bacteria) in our gut. Potato salad is one easy and yummy way to incorporate cooked and cooled potatoes into your diet. It readily lends itself for school or work lunches, eaten straight from the fridge as leftovers or prepared ahead of time for every day dinners, dinner parties or picnic lunches.

Ingredients:

  • 1 potato, cut into 1cm cubes (approx 150g)

  • ½ carrot, cut lengthways then into rounds

  • ¼ cup peas (you can buy frozen organic peas in most organic shops)

  • 1-2 rashes of pastured bacon or rounds of diced pastured ham (optional)

  • tallow (or natural fat of choice) for frying bacon

  • 1-2 tablespoons home made mayonnaise (see recipe below)

  • unrefined salt

  • cracked pepper

Directions:

Steam potato, carrots and peas until soft. Add to a bowl.

Meanwhile, dice bacon and stir fry in a small saucepan in tallow (or fat of choice) until cooked. Add to the bowl. If using ham instead of bacon add it to the bowl.

Mix ingredients in bowl to combine.

Refrigerate for 24 hours to allow resistant starch properties of the cooked and cooled potatoes to form. When ready to consume, stir through mayonnaise and season with any additional salt and pepper.

Serves 1-2 depending if consuming as a side or a main.

Note: I tend not to peel the skin on potatoes unless they are particularly grubby / full of soil. This typically depends on the variety of the potato. Sometimes a little scrub with a brush and water is enough to remove excess dirt.
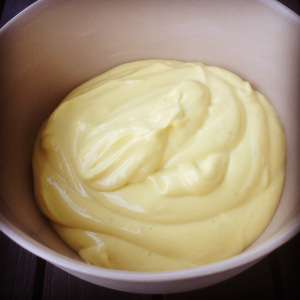
Mayonnaise

Ingredients:

  • 3 egg yolks

  • 1 tsp Dijon style mustard

  • 1.5 tbsps lemon juice

  • 1 tbsp whey (optional)

  • 1/8 tsp unrefined salt

  • cracked pepper

  • ¾ cup olive oil

Directions:

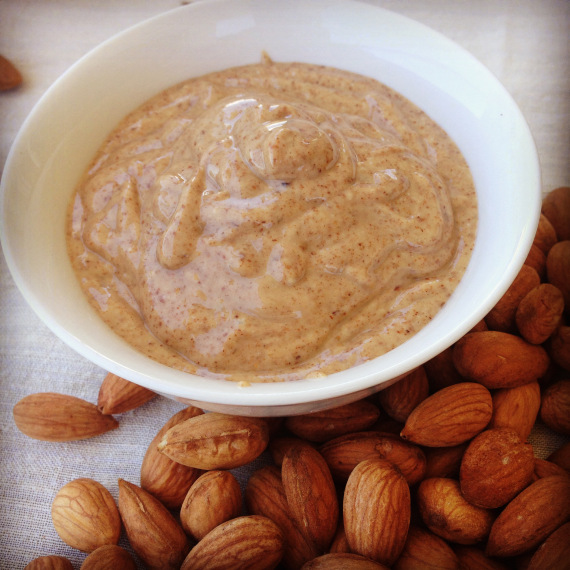
Blend together all ingredients, other than the olive oil, with a hand held blender. With the blender still running, very slowly pour in the olive oil a little at a time. The result should be a thick creamy paste.

Makes 1 cup. Keep refrigerated.

Note: Without the whey, mayonnaise will keep for about 2 weeks. The addition of whey will help your mayonnaise last longer, adds enzymes and increases nutrient content. With the whey, mayonnaise keeps for several weeks in the fridge and will become firmer with time.


How To Make Almond Butter

Becca Crawford

I am often asked about nut butters.

To be honest I am not a huge fan of them. And here’s why: It takes a lot of nuts to yield a very small amount of nut butter. eg 1.5 cups of almonds yields only a bit more than 1/2 cup of almond butter.  

So you end up consuming a heck of a lot of nuts in each spoonful of nut butter, much much more than you should typically eat if you were eating whole nuts. And what’s wrong with nuts? In small amounts, for those who don’t have digestive issues or mineral deficiencies, nuts are awesome and in fact ranked as the 3rd most nutrient-dense food on the planet behind organ meats and herbs and spices (according Harvard University Chemist Dr Mat Lalonde. Check out pages 70-71 of Chris Kresser’s book “Your Personal Paleo Code” 2014 for a list of the most nutrient-dense foods). However nuts do contain more omega 6 than omega 3 polyunsaturated fatty acids (which has an inflammatory effect on the body).

Secondly, unactivated nuts (ie nuts that have not been properly prepared through soaking and dehydrating) contain phytic acid which leaches minerals from the body and leads to digestive issues. Without doing a full due diligence I bet all store-bought nut butter are made from nuts that have not been properly prepared or “activated” (happy to be proved wrong here).

Thirdly, nut butters are typically consumed on bread and I have spend the past decade trying to reduce the amount of gluten (and grains generally for that matter) from my and my kids’ diet. The reasons for this go beyond the scope of this post but contact me should you wish to discuss the relevance and effect of grains on the human body.  The occasional consumption of smallish amounts of gluten-free properly prepared grains is fine for those without digestive issues (eg rice, buckwheat).

So eating huge amounts of nut butters, especially when the nuts are not activated, involves taking a massive omega 6 and phytic acid hit. It’s is a bit like the orange juice analogy where you end up consuming the fructose equivalent of 5 oranges in 1 glass of orange juice even though you couldn’t possibly eat 5 oranges in one sitting.

So if you are going to consume nut butters here’s what i suggest:

1. it’s best to make them yourself at home from activated nuts; and

2. consume only small amounts eg a couple mouthfuls at a time especially for youngsters.

Here’s how to make almond butter.  It’s dead easy:

Ingredients:

2 cups of salted activated almonds
2 tablespoons of coconut oil

Directions:

Process ingredients in a food processor for 15 minutes (yes that long!) stopping the food processor every few minutes to scrap down the sides and to prevent the machine from overheating. If making larger amounts, add the nuts in batches in the food processor.

Some recipes don’t require the addition of coconut oil. I found that without the coconut oil this makes the almond butter really hard to swallow and gets stuck on the back of your throat (hardly pleasant). Because my activated nuts are salted I don’t need to add additional salt. If yours are not salted you might like to add 1/4 tsp salt to the food processor.

Serve:

Eat straight off the spoon as is for a decadent dessert or snack, or with vegetable sticks, or smeared on slices of apple or pineapple, or drizzled onto pancakes or on a slice of traditionally prepared bread (stay tuned for my future posts on various buckwheat loaves – they are still a work in progress). Some add nut butters to their smoothies.  You can add a drizzle of honey or maple syrup onto your nut butter (which I did as you can see in the above photo).

Storage:

Nut butters keep for many weeks in a sealed container or jar in the fridge. The downside is that they will go quite hard though in the fridge. They will keep a few days out of the fridge.

Variations:

You can substitute any other type of nut. Macadamias don’t require as long in the food processor presumably due to their higher oil content. You just need to keep processing until the nuts reach the consistency of a smooth, creamy, butter. This will depend on the type of nut and how powerful your food processor is. You can flavour or sweeten your nut butter by adding the following while processing such as:

  • raw cacao powder, cinnamon powder, and/or vanilla bean powder

  • raw honey or maple syrup

  • turmeric, cumin, ginger, garlic powder and/or chilli flakes (I’ve made turmeric and brazil nut butter before)

In this way you can make your own spreads and butters without resorting to expensive store bought varieties. Have you made nut butter before?  What ingredients did you use?

The photos below show you the transition from whole almonds to almond butter at 4 minute intervals over 15 minutes of processing.

Guacamole dip

After running a dips, dressings and sauces class a couple of weeks ago, here's another easy peasy delicious gem to add to your repertoire of home-made dips. Who doesn't love guacamole? A winner with young and old. This is something that you could easily get kids involved in making or whip up a just before sitting down to your meal or before guests walk in the door (or even after they arrive!).

Ingredients: 1 avocado
1 tablespoon (20ml) lemon juice 1 tablespoon (20ml) extra virgin cold pressed olive oil 1 tablespoon (15g) red onion, diced
2 tablespoons (35g) ripe tomato, diced
1 clove (5g) garlic, finely diced
1 tablespoon fresh coriander (chopped), plus extra for garnishing (optional)
4 drops Young Living lime essential oil 1 drop Young Living black pepper essential oil
A scattering of dried or fresh chilli for garnishing (optional)
Unrefined salt

 Directions

Cut avocado in half, remove seed and scoop flesh into a bowl (I like to score the avocado in squares with a knife before scooping out flesh). Roughly mash avocado with the back of a fork but don’t overdo it- you want it a little chunky. Add all other ingredients. Season with sea and pepper to taste. Mix ingredients until well combined. Garish with extra coriander leaves before serving.

Serve as a side with main meal or as a dip with vegetable crudities. Serves 2. If you are having guests over I would triple the quantity.

For a creamier version, add 1 tablespoon of crème fraiche. Guacamole purists might be horrified, but who cares.

Tip: If not serving straight away, sit the avocado seed in the dip (this helps to stop it going brown), cover with cling wrap and refrigerate. Avocado tends to oxidize (go brown) quite quickly so I tend to just make enough for one sitting and do not make in bulk.

At its most simplest level you can make a simple avocado and lemon dip with just 1 avocado, 1 tablespoon lemon juice and season with salt and pepper. Now that's one that you could delegate to the kids while you kick back with a chardy (organic of course). (In reality I'd be kicking the piles of dirty laundry strewn all over the floor while poorly multi-tasking 50 other tasks that are required to be done in an impossibly short space of time). But life is too short to skimp on good food so ALWAYS make time to prepare and enjoy a beautiful meal with loved ones. The laundry can always wait.